Tuesday, September 25, 2007

Knigtingales Help!

Hello everyone! My friend is in a cappella group on campus and they want a logo design for their t-shirts. I figured since they want something cute and cartoony that it would be a fun blog topic idea! So here is what she sent me. Thanks guys!
-Alexis

"We're basically looking for a logo or character to put on t-shirts for the Knightingales A cappella group. We're a small group of all girls and are looking for something cute but Knight-like. It doesn't have to be big eyed-puppy cute, but we want a nightingale bird, with some knight-armor or accessories with it. It is a singing group, so maybe some notes and treble/bass clefs can be incorporated. interpretation is up to you, and if you feel you have a better idea then what I've described, then go for it: we're open to anything. Thanks So Much!"
Wednesday, September 12, 2007

Ladybug: Action Brush

Here are some instructions for putting the brush on your computer and using all the right settings. In this tutorial, I am using Photoshop CS3 but the menus and settings are the same for all versions of Photoshop.

The brush files can be found in the network in the folder "LBAH Storyboard - Photoshop Brush." Copy the LadybugActionHero.abr file into your "Photoshop CS (2 or 3) - Presets - Brushes" folder and start Photoshop. (Photoshop has to be off while you are putting the brush in. If Photoshop is on while you install the brush, you can restart it so you can get to the brush).

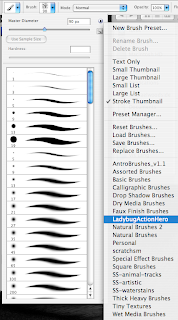
First, press "B" on your keyboard or just click on the brush in the tools box. Once you have the brush icon selected, click on the brush palette in the top left corner. Select the side dropdown arrow at the top right of the Brush palette. Find the "LadybugActionHero" set from the list. Select it.


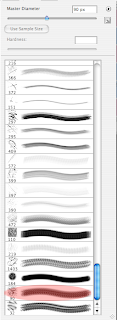
Tell it to append it to your list of brushes. Scroll down to the bottom of the list and select the brush that looks like this:


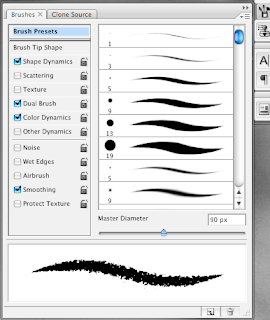
Then select the Brush Palette by going to "Window - Brushes" and you see this window. Make sure your Master Diameter is set to 90. (The brush stroke in the images below is the final brush. Yours will look differently as you follow the steps but at the end, they should look the same)


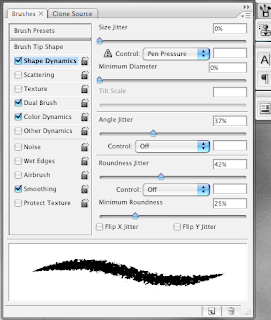
Check the box for "Shape Dynamics" and select it so you can modify its settings to the following:


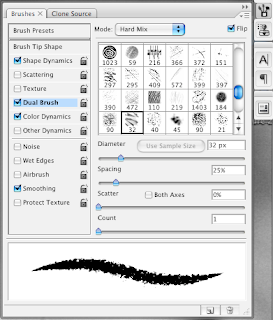
Then check and select "Dual Brush" and match these settings. Make sure that you have selected the same dual brush (number 32) and the Mode at the top is set to "Hard Mix." Double Check the "Diameter, Spacing, Scatter, and Count" settings.


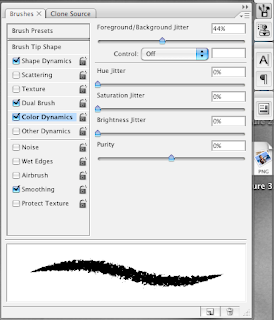
Then check and select "Color Dynamics" and match these settings. This gives us the "Painterly look" for the mixing of colors. (See description at the end for why we are using this)


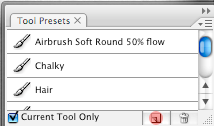
Now that you have your brush settings set, click on the "Tool Presets" icon or go to "Window - Tool Presets."


Select the button similar to the New Layer button.


Type in "Ladybug Action Hero" and make sure the "include color" box is unchecked. Click OK.


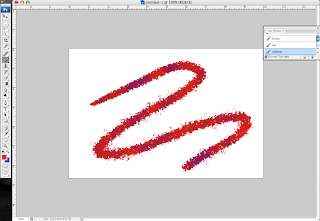
Now use your brush. As you can see, I have my foreground color set to red and my background color set to blue so the stroke interpolates between those colors and creates a blended look. The foreground color is the dominant one. (Obviously we would use colors closer to eachother in hue, this is just to illustrate the point).


We decided that the backgrounds are the same style as what is printed and hanging in the back of the computer lab. The characters should use this same brush, but make the foreground and the background the same color when painting them (so it only paints one color). This way, they are distinguishable from the background. Have a good time.